Anyone who’s lived through a renovation in New York knows the drill. You plan, you dream, the work finally ends… and then the dust hits you. It’s everywhere. On your shelves, in the air, in corners you didn’t even know existed.
That “wow, fresh new space” vibe? It disappears real quick when your living room feels like a construction site. The good part is, it doesn’t have to stay that way. A little strategy goes a long way in tackling the chaos. Doesn’t matter if it’s a tiny Brooklyn apartment or a family home in Queens—these steps will help you breathe easier, literally.
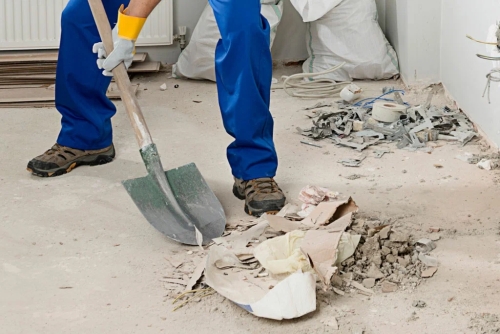
Step 1: Kick Out the Big JunkFirst things first, deal with the bulky leftovers. We’re talking scrap wood, broken tiles, packaging, nails—all the stuff that just screams “unfinished.” These big items make the space look ten times worse.
Grab some heavy-duty trash bags, and if your project was major, consider renting a small dumpster. And remember—this is New York. Sanitation rules are strict, and you do not want a fine just because you tossed the wrong material on the wrong day.
A lot of locals go for professional construction cleaning at this stage. It’s faster, less stressful. But if you’re doing it solo, knock out the big stuff first. Smaller debris will feel way less overwhelming afterward.
Step 2: Air It OutBefore you grab a broom, open those windows. Even a crack makes a difference. Dust from construction hangs in the air long after workers are gone, and in a Manhattan apartment, it feels like it never leaves.
Set up fans if you can, push that stale air outside. Trust me, it feels instantly fresher. Bonus tip—wear a mask while you do this. Your lungs will thank you.
Step 3: Go Dry Before You Go WetHere’s where most people slip up. They go straight for a wet mop. Big mistake. Wet plus construction dust? Sticky sludge. Impossible to clean.
Do a dry sweep first. Microfiber cloths, feather dusters, or a vacuum with a brush attachment—whatever works. Start high, end low. Ceiling fans, shelves, door frames, all that. In old brownstones especially, dust hides in every weird little crevice.
Once the surfaces look clear, then bring out the mop. Trust me on this one—it saves you hours.
Step 4: Leave Floors for LastFloors catch the worst of it. Paint drips, plaster bits, sawdust—it all ends up there. But don’t touch them yet. Clean every other surface first, because dust will fall again.
When you finally get to it, vacuum carefully. Hardwood needs extra love, it scratches easily. Tiles or stone floors can take a good scrubbing. And if you live in a high-rise, don’t forget—whatever you track out into the hallway can travel right into your neighbor’s place.
Step 5: Hunt Down the Sneaky SpotsThis step makes or breaks the whole cleanup. Dust hides in the strangest places. Inside closets. On top of lights. Behind the fridge. Even in vents you haven’t looked at since you moved in.
And then there’s the toughest part—cleaning concrete dust. That fine powder clings like it owns the place. Best way to fight it? A slightly damp microfiber cloth. It grabs the dust instead of just pushing it around. It’s slow work, but once you hit those hidden spots, your space finally starts feeling livable again.
Step 6: Don’t Skip the Air SystemYour HVAC system worked overtime sucking in dust while the renovation was happening. If you ignore it, guess what? All that junk ends up back in the air you’re breathing.
Vacuum vents, wipe the covers, and check your filters. In a lot of cases, just replace them—it’s cheap and saves you from weeks of sneezing. Some folks even schedule a duct cleaning if the project was big. It’s one of those “future you will be grateful” moves.
Step 7: Shine It UpNow comes the fun part—the final polish. Clean the windows till they sparkle. Buff the mirrors. Wipe down faucets and counters until they actually shine. Kitchens and bathrooms pop the most after this step.
And here’s the truth: if you’re exhausted by this point (and let’s be honest, you probably are), there’s no shame in calling in a team just for this stage. A quick professional touch makes the whole renovation feel truly finished.
Why Cleaning Properly Really Matters in NYIn this city, space is tight. Even a small mess feels bigger when you don’t have extra room to spread out. After a renovation, dust can make your shiny new upgrades look dull and, worse, mess with your air quality.
Doing the cleanup right means you can actually enjoy the improvements you worked (and paid) for. It’s not just about looks—it’s about comfort, health, and having a place that feels like home again.
Final ThoughtsRenovations always sound exciting until the cleanup hits. The good thing? You don’t need to let the mess drag you down. Clear the big stuff, air it out, dust smart, and give attention to the details. Suddenly, that dusty apartment feels like the fresh new space you dreamed of.
And if it feels like too much after long subway rides and busy NY schedules? Hand it off. Let professionals handle the dirty work while you finally kick back and enjoy the place you’ve been waiting for.


 Furnished 3 Bedroom Apartment for Rent with Premium Services in Bashundhara R/A